 Shotleaf
Guide
How Shotleaf works
Everything it does, step by step: what to press, what you’ll see and what to do if something doesn’t work. The pictures are Shotleaf’s own windows.
First launch
- Download
Shotleaf.dmg, open it and drag Shotleaf onto the Applications folder next to it. - Open Shotleaf. The first time, macOS says it can’t check the app: Shotleaf isn’t notarised by Apple yet. Open System Settings › Privacy & Security, scroll down and click Open Anyway. You do this once.
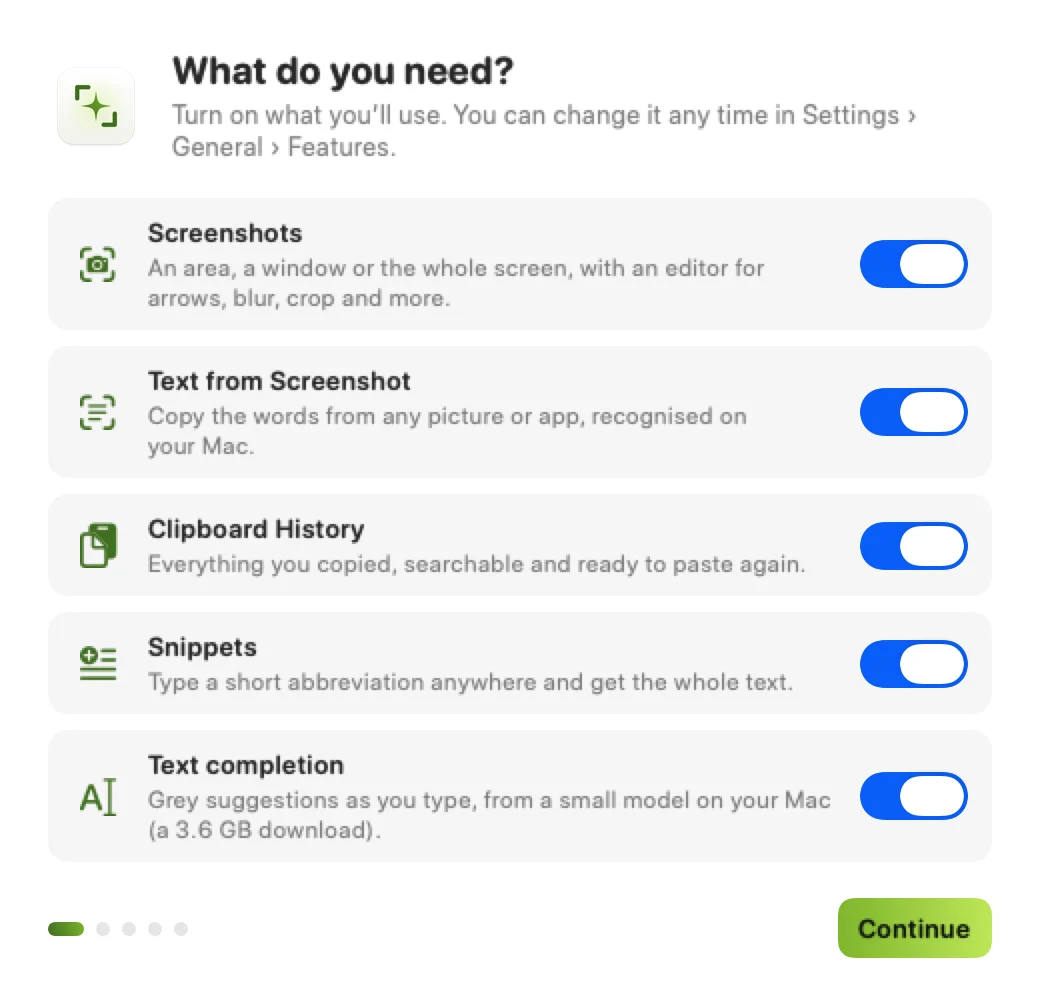
- The setup guide opens. First pick the tools you want: the rest stay off, and you can change this any time in Settings › General › Features.
- Allow the permissions those tools need; the guide asks only for those. After you turn one on in System Settings, Shotleaf restarts by itself and brings you back to the guide.
- Take your first screenshot right from the guide. Its last page shows how to use the other tools you picked.
- Screen Recording
- For screenshots and for text from the screen. Without it a screenshot shows only the desktop picture.
- Accessibility
- To paste from the clipboard history into the app you were in, to expand snippets as you type, and for text completion.
Text completion also needs its language model, Gemma 4 E2B (about 3.6 GB). It’s optional: download it from the setup guide or later in Settings › Completion. Everything else works without it.
Shotleaf lives in the menu bar: the leaf icon at the top of the screen. Every tool is also on a shortcut.
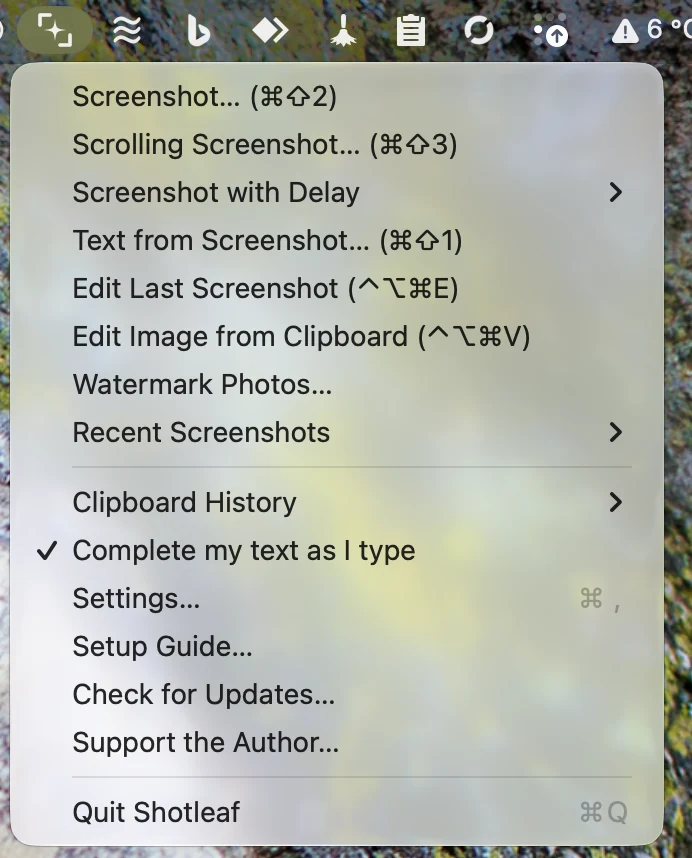
Updates. When a new version is out, Update to Shotleaf… appears at the top of the menu. Shotleaf downloads it, checks that it’s genuine and restarts into it in a few seconds, with your settings and permissions. It looks for a new version at launch and once a day; turn that off in Settings › General.
Screenshots
Press ⌘⇧2. The screen dims, and a magnifier follows the pointer so you can aim to the pixel.
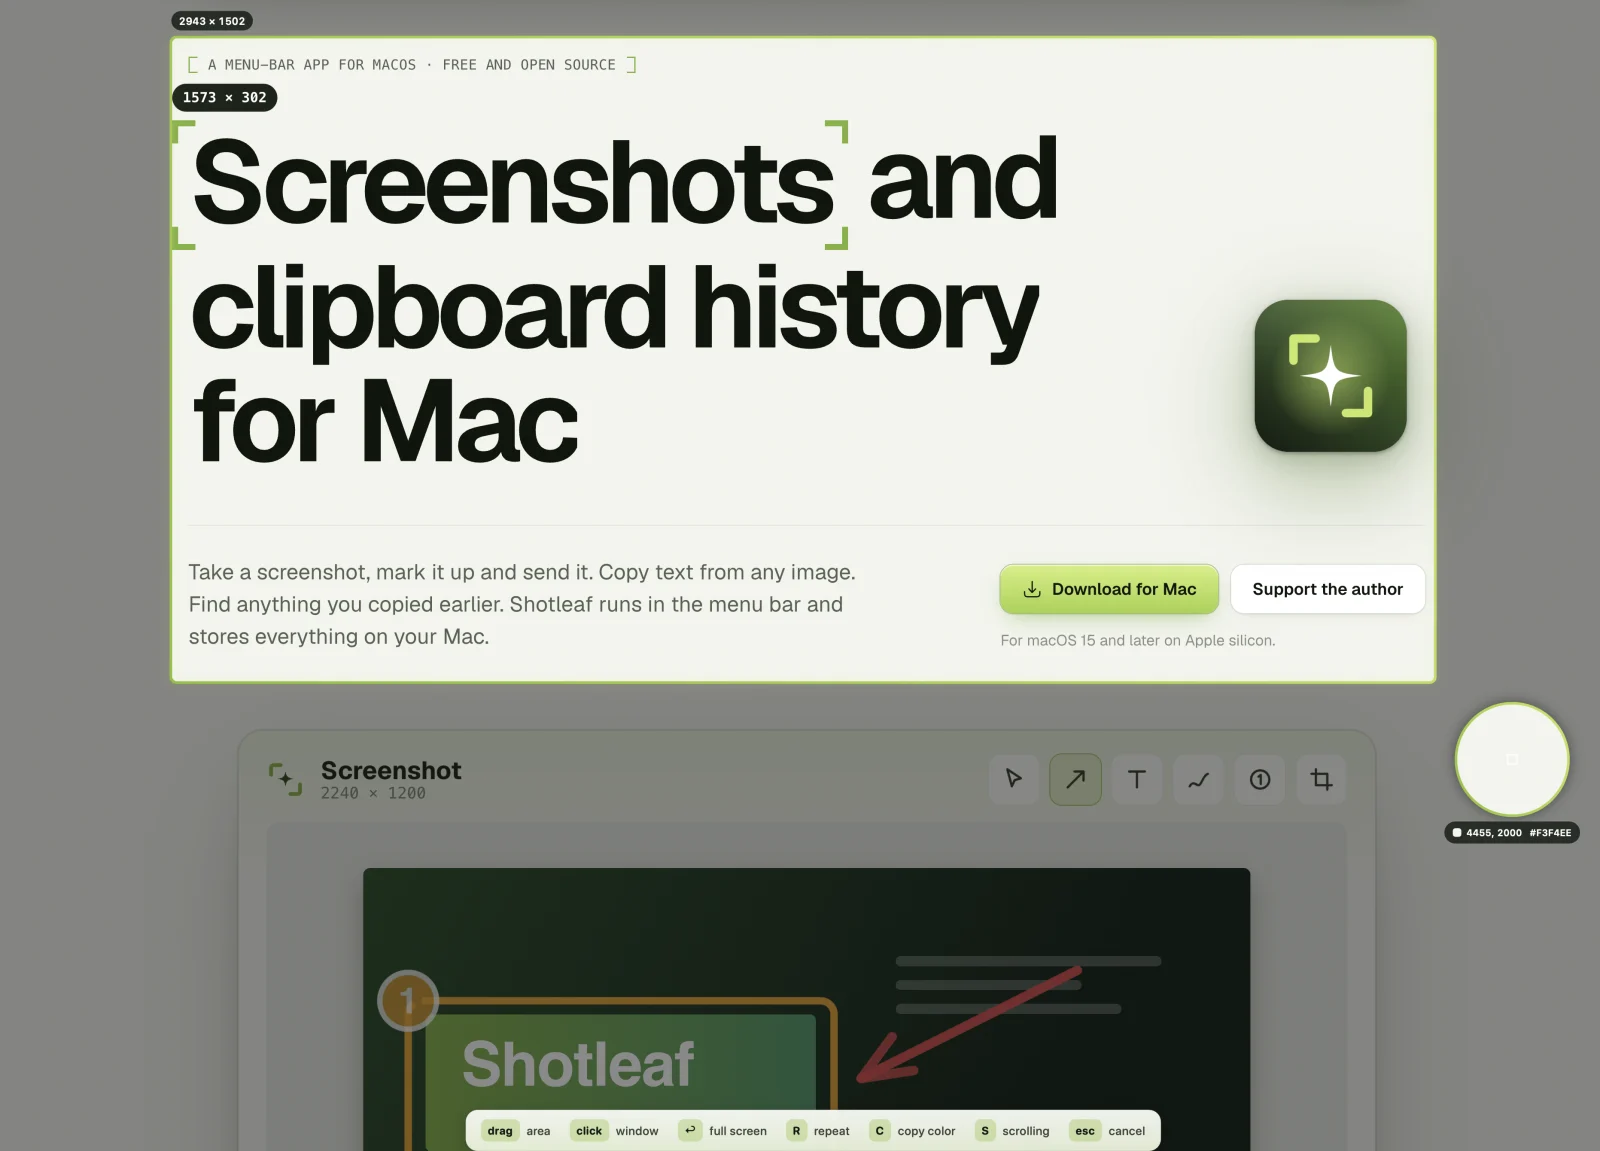
| Drag | an area; its size shows next to it |
| Click | the window under the pointer |
| ↩ or F | the whole screen |
| R | the same area as last time |
| S | switch to a scrolling screenshot |
| C | copy the colour under the pointer as HEX, like #7CB342 |
| esc or right click | cancel |
The shot opens in the editor. To skip it, choose in Settings › Screenshots › After a screenshot: copy, save, or both.
With a delay
To catch an open menu or a tooltip, take the screenshot from the menu bar: Screenshot with Delay, 3, 5 or 10 seconds. A countdown shows at the top of the screen; it never gets into the shot. A delay for every shot is in Settings › Screenshots.
Back to an earlier shot
⌃⌥⌘E opens the last screenshot in the editor again, as it was taken. The menu bar keeps the last ten under Recent Screenshots, even after a restart. ⌃⌥⌘V opens any picture from the clipboard in the editor, to mark it up like a screenshot.
The editor
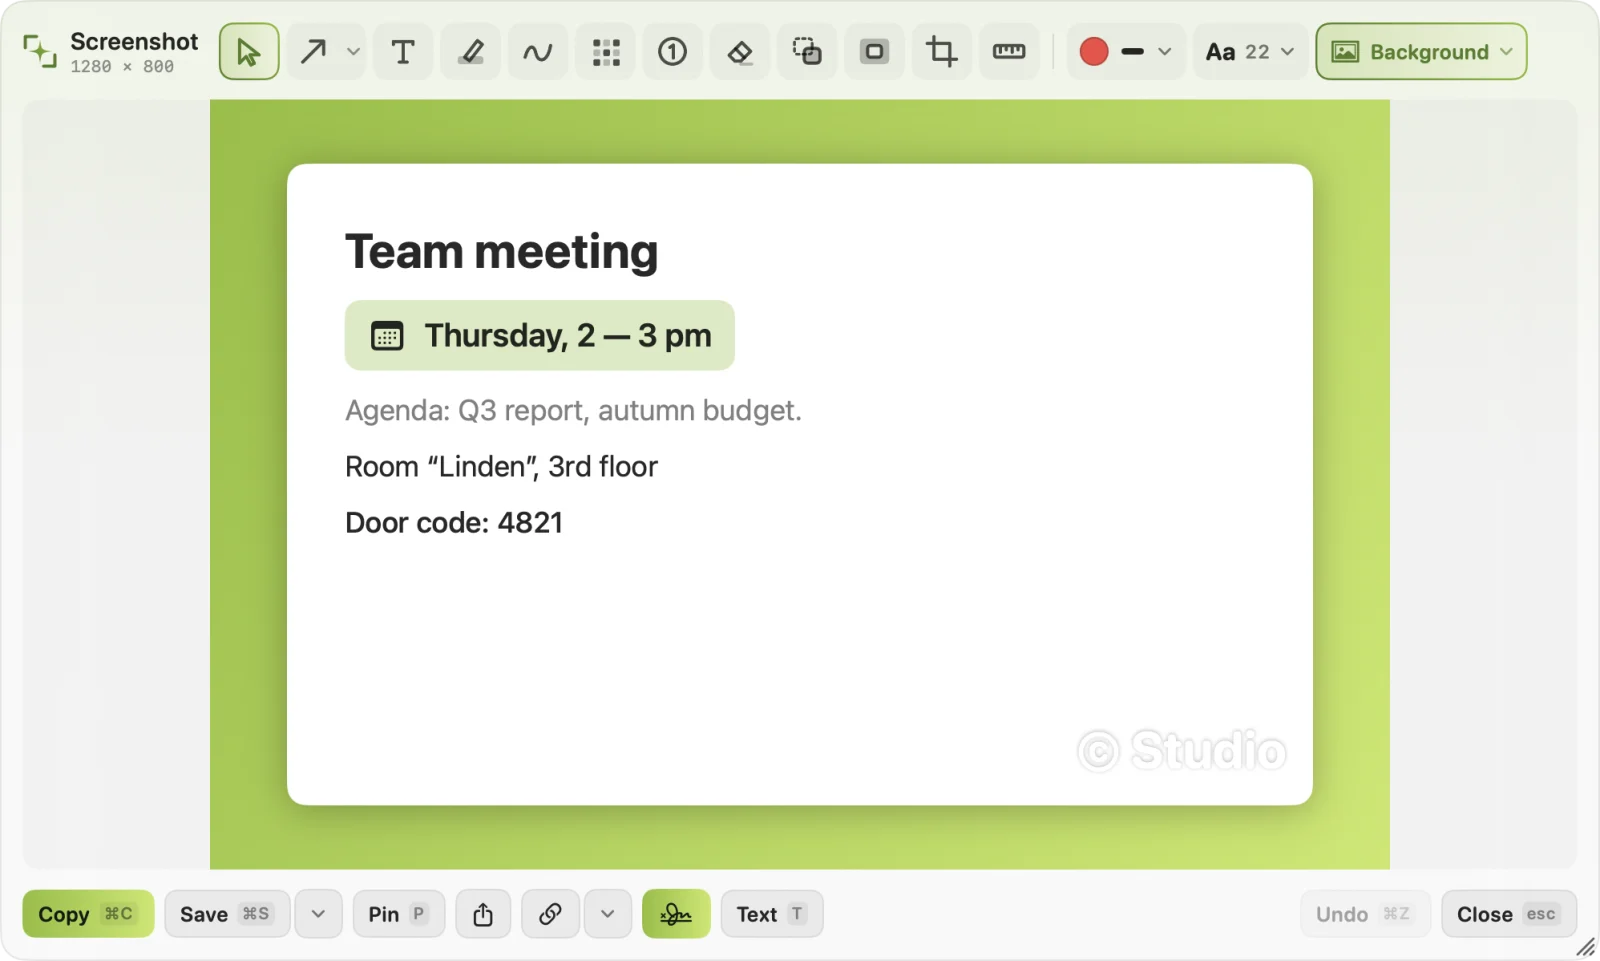
Tools are along the top, what to do with the result along the bottom. Each tool has a key, so you rarely need the mouse to switch.
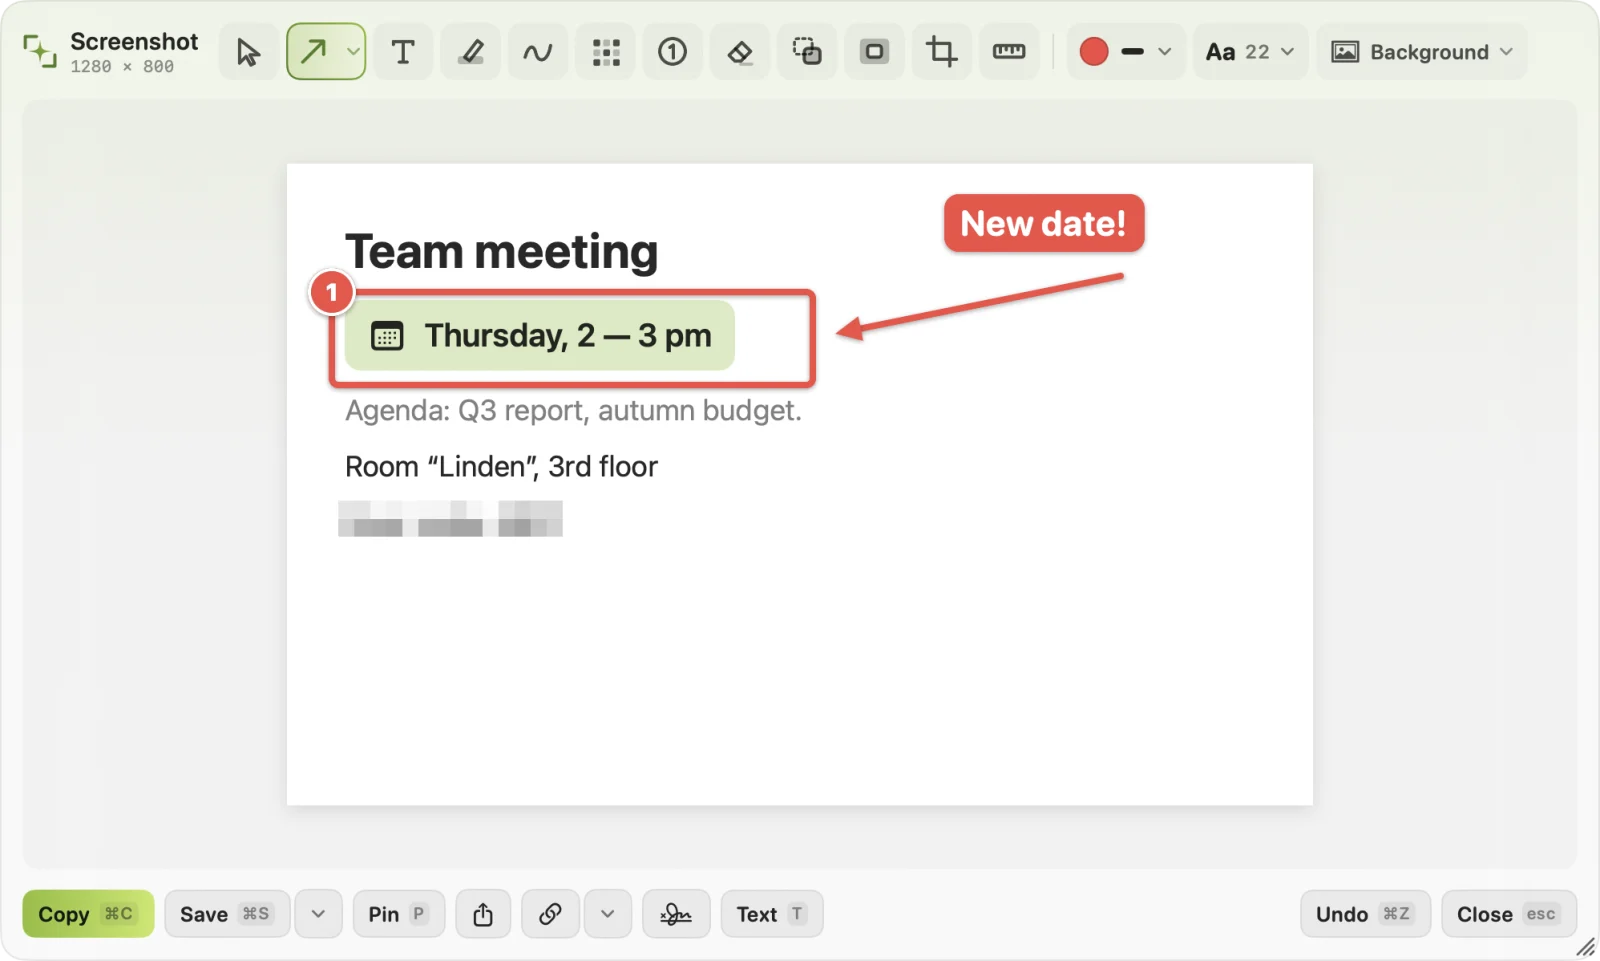
| 1 | Arrow. The arrow button’s menu also has the box and the oval. |
| 2 · O | Box · Oval |
| 3 | Text: a callout on a bubble |
| 4 · D | Marker · Pen. Hold ⇧ while drawing with the pen for a straight line. |
| 5 | Blur: hides names, numbers, faces |
| 6 | Steps: each click drops the next number, 1, 2, 3 |
| 7 | Erase: paints over with the colour around, wipes text off a plain background |
| 8 | Cut: moves a piece of the picture |
| 9 | Focus: dims everything except the area |
| C · M | Crop · Ruler (length in pixels) |
| 0 | Select: click a mark to move, resize or delete it (⌫) |
The colour, line width and text size are next to the tools. ⌘Z undoes, ⇧⌘Z redoes. You can change the keys or hide tools you don’t use in Settings › Tools.
What to do with the result
| ⌘C | Copy. The editor then closes by itself; to keep it open, turn that off in Settings › Screenshots. |
| ⌘S | Save to the folder from Settings (the Desktop at first). The arrow next to it saves as PNG, JPEG, HEIC or PDF wherever you choose. |
| Drag | the picture (with Select, 0) straight into a chat, an email or a folder |
| P | Pin: the shot floats over your windows while you work. Hover it to copy or close it. |
| Link | The link button uploads the shot and copies a link that works for 1, 6 or 12 hours, then the picture is deleted. |
| Share | AirDrop, Messages, Mail and the rest of the system share menu |
| T | Text: select words right on the screenshot, ⌘C copies them |
| esc | Close |
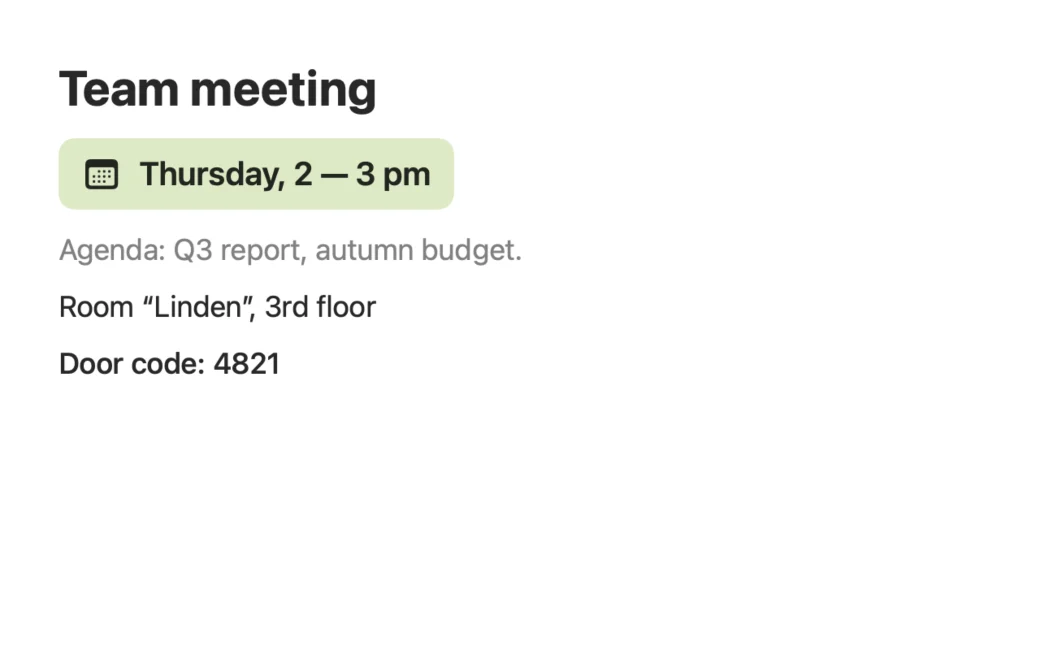
Background and watermark
Background puts the shot on a gradient or a colour, with rounded corners and a margin you set: good for posts and presentations. For a photo, the same menu can remove its background and keep the subject. The signature button stamps your watermark: text or a logo, in one of nine spots, with its size, see-through and tilt.
Scrolling screenshots
For anything longer than the screen: a web page, a chat, a table.
- Press ⌘⇧3 (or S in the usual picker) and select the part that scrolls.
- Scroll down slowly, at your own pace. The bar under the area shows the height so far.
- Press Done or ↩. The long shot opens in the editor.

If the bar says Too fast, scroll back up a little and go on slower. Headers that stay in place (a site’s top bar) appear in the result once.
Text from the screen
Press ⌘⇧1 and select any area: a picture, a video, a dialog you can’t copy from. Its text opens in a small window, where you can fix it before copying. ⌘C copies it all and closes the window; with part of the text selected, it copies just that.
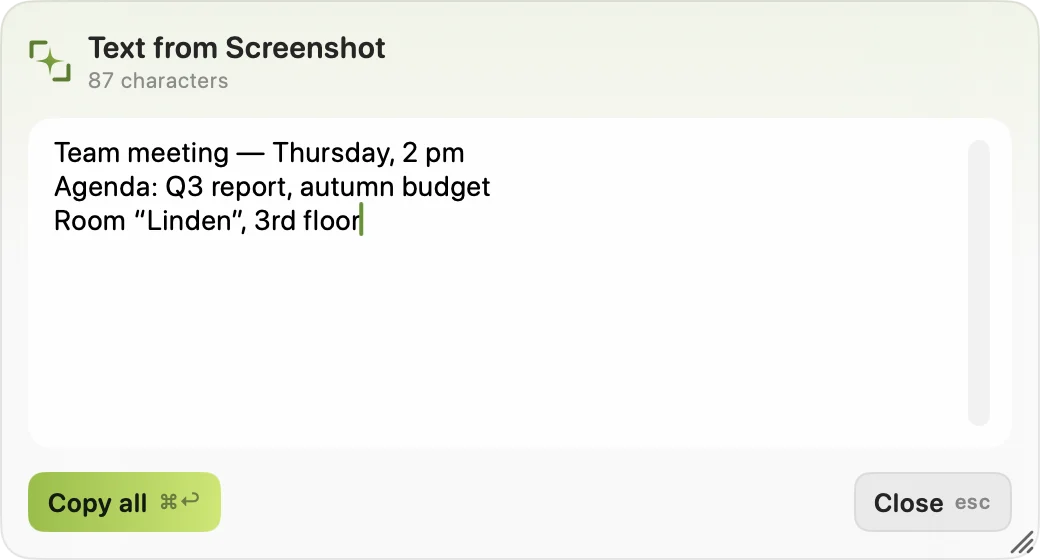
It’s recognised on your Mac, works offline and reads Ukrainian, English and the other languages macOS knows.
Clipboard history
Everything you copy is kept: text, links, pictures, files and colours. Press ⇧⌘V and the panel opens next to the pointer.
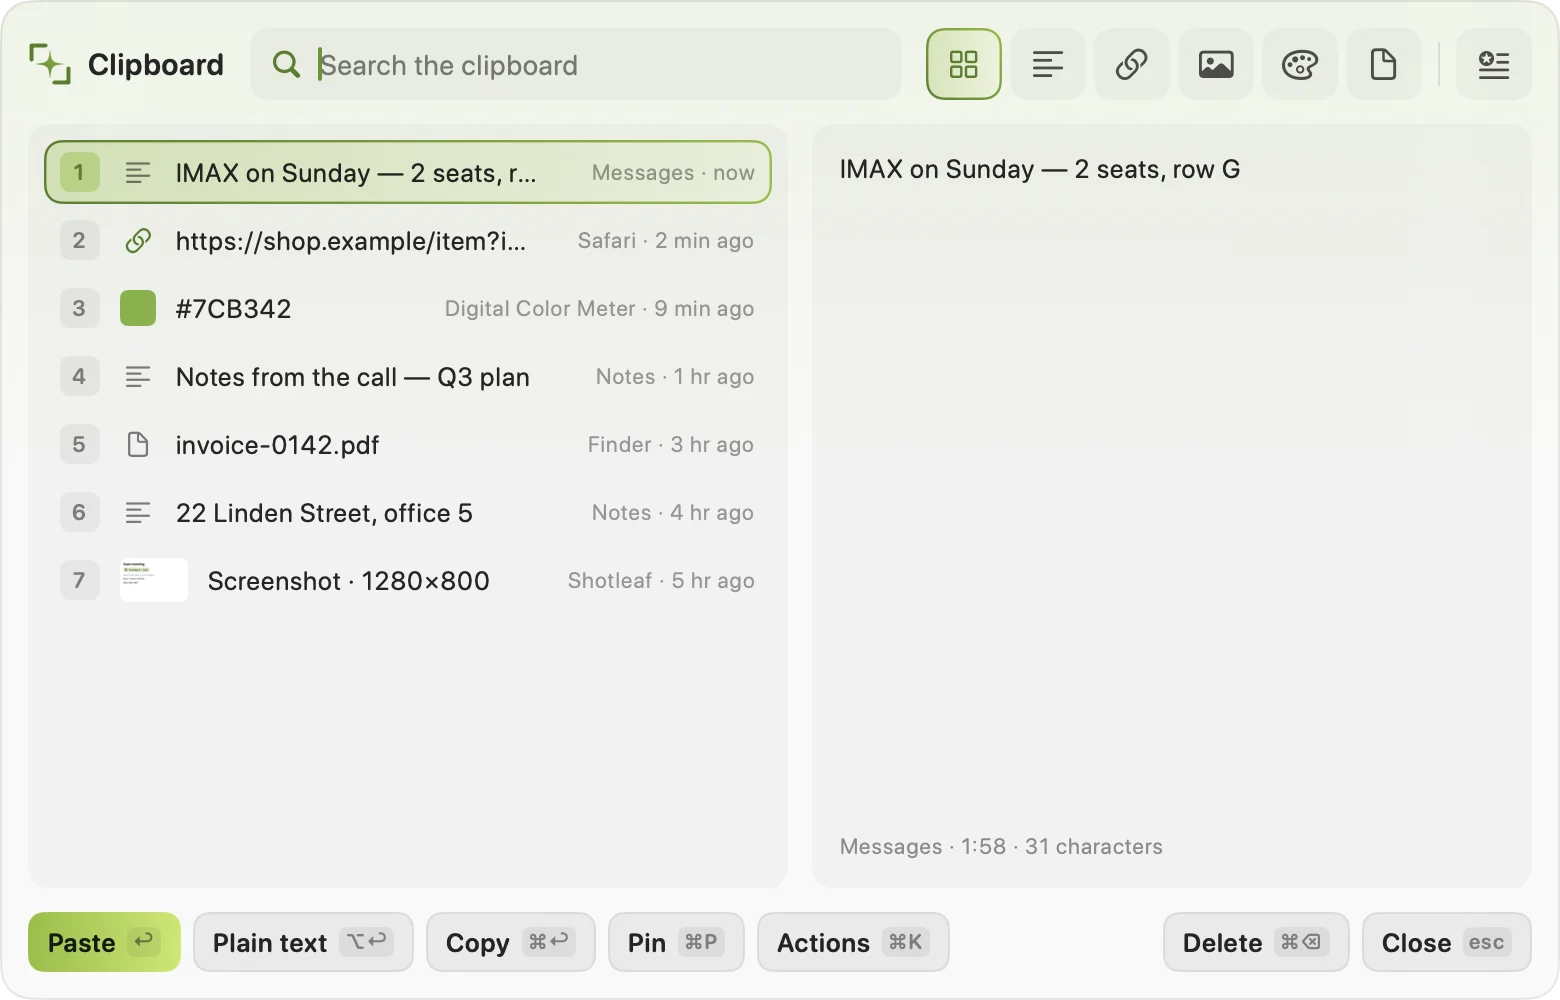
| ↩ | paste into the app you were in |
| 1–9 | paste that row at once |
| ⌥↩ | paste as plain text, without formatting |
| ⌘↩ | only copy, don’t paste |
| ⌘P | pin: pinned entries stay when the history is cleared |
| ⌘E | open a picture in the screenshot editor |
| ⌘⌫ | delete the entry |
| ⇧Tab | only text, links, pictures, colours or files |
| Tab | switch to the snippets |
Search
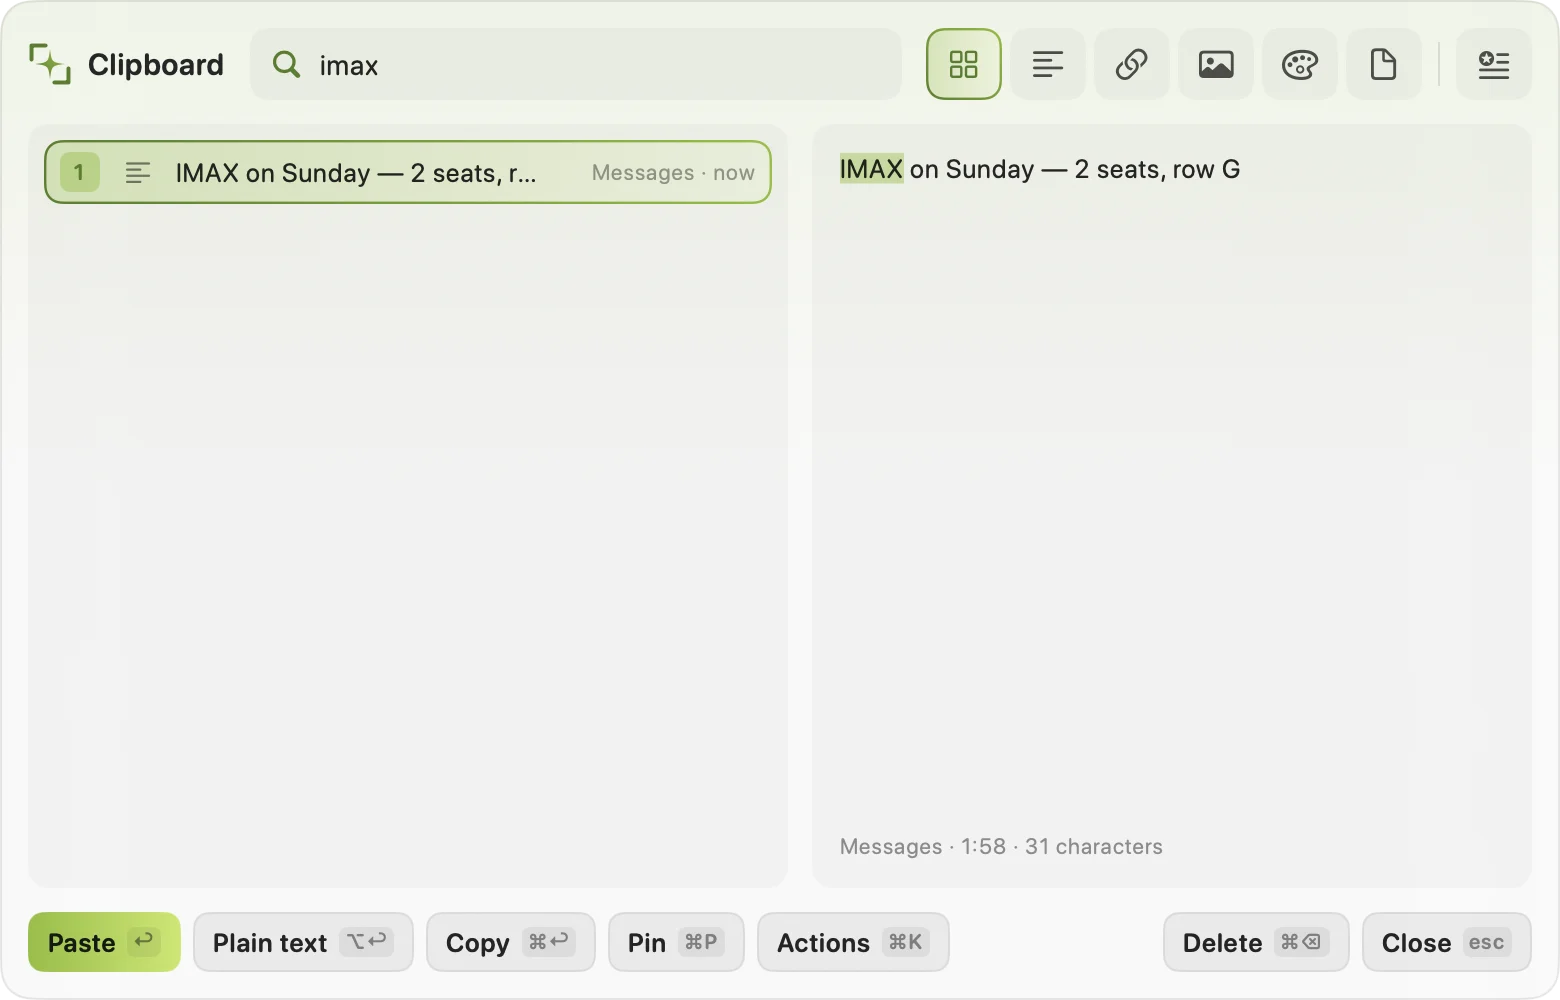
Just start typing. It finds any word, including words inside pictures and screenshots.
Several at once
Mark entries with ⌘-click or ⇧↓ / ⇧↑. Then ↩ pastes them together, a line each, and ⌘↩ one by one: the first now, and each next ⇧⌘V pastes the next. Handy for filling a form field by field.
Quick actions
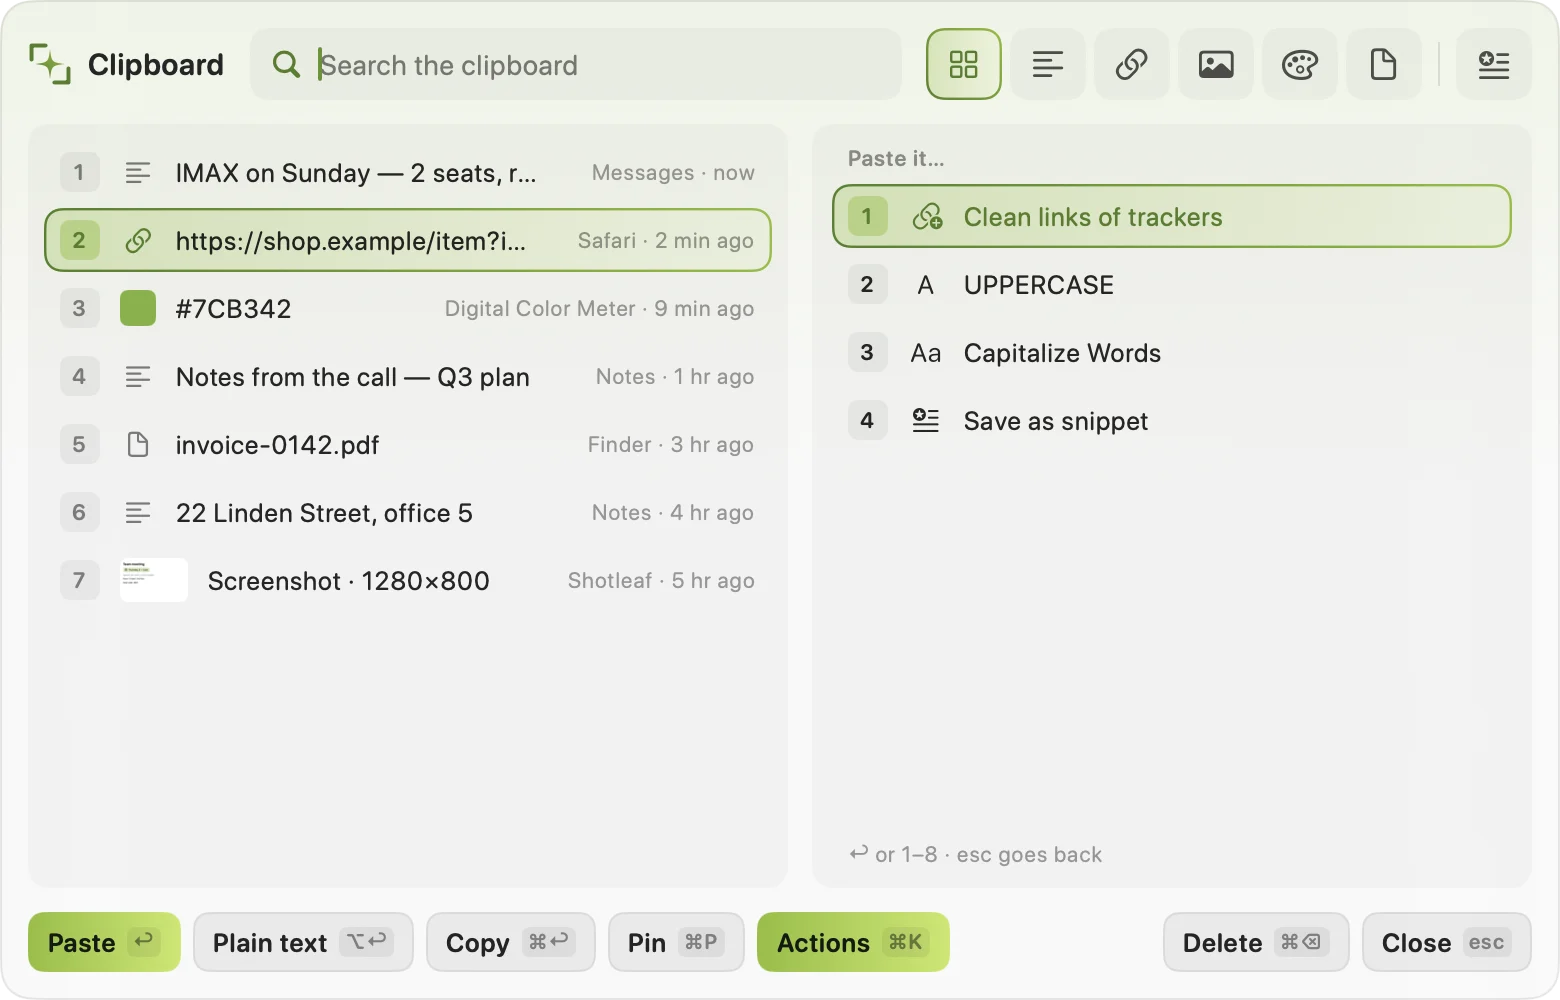
⌘K shows what you can do with the entry before pasting: clean a link of trackers, change the case, join lines into one, trim spaces, format JSON, save it as a snippet.
Privacy
- Passwords that password managers mark as private are never kept, and nothing is kept from the apps in Settings › Clipboard › Never in these apps (text completion stays off in them too).
- Text that looks like a card number or an access token never reaches the disk and is gone from the history after a minute.
- The menu bar can pause the history for 5 minutes or clear it. By default it keeps 200 entries, pictures for 30 days; both are in Settings.
Snippets
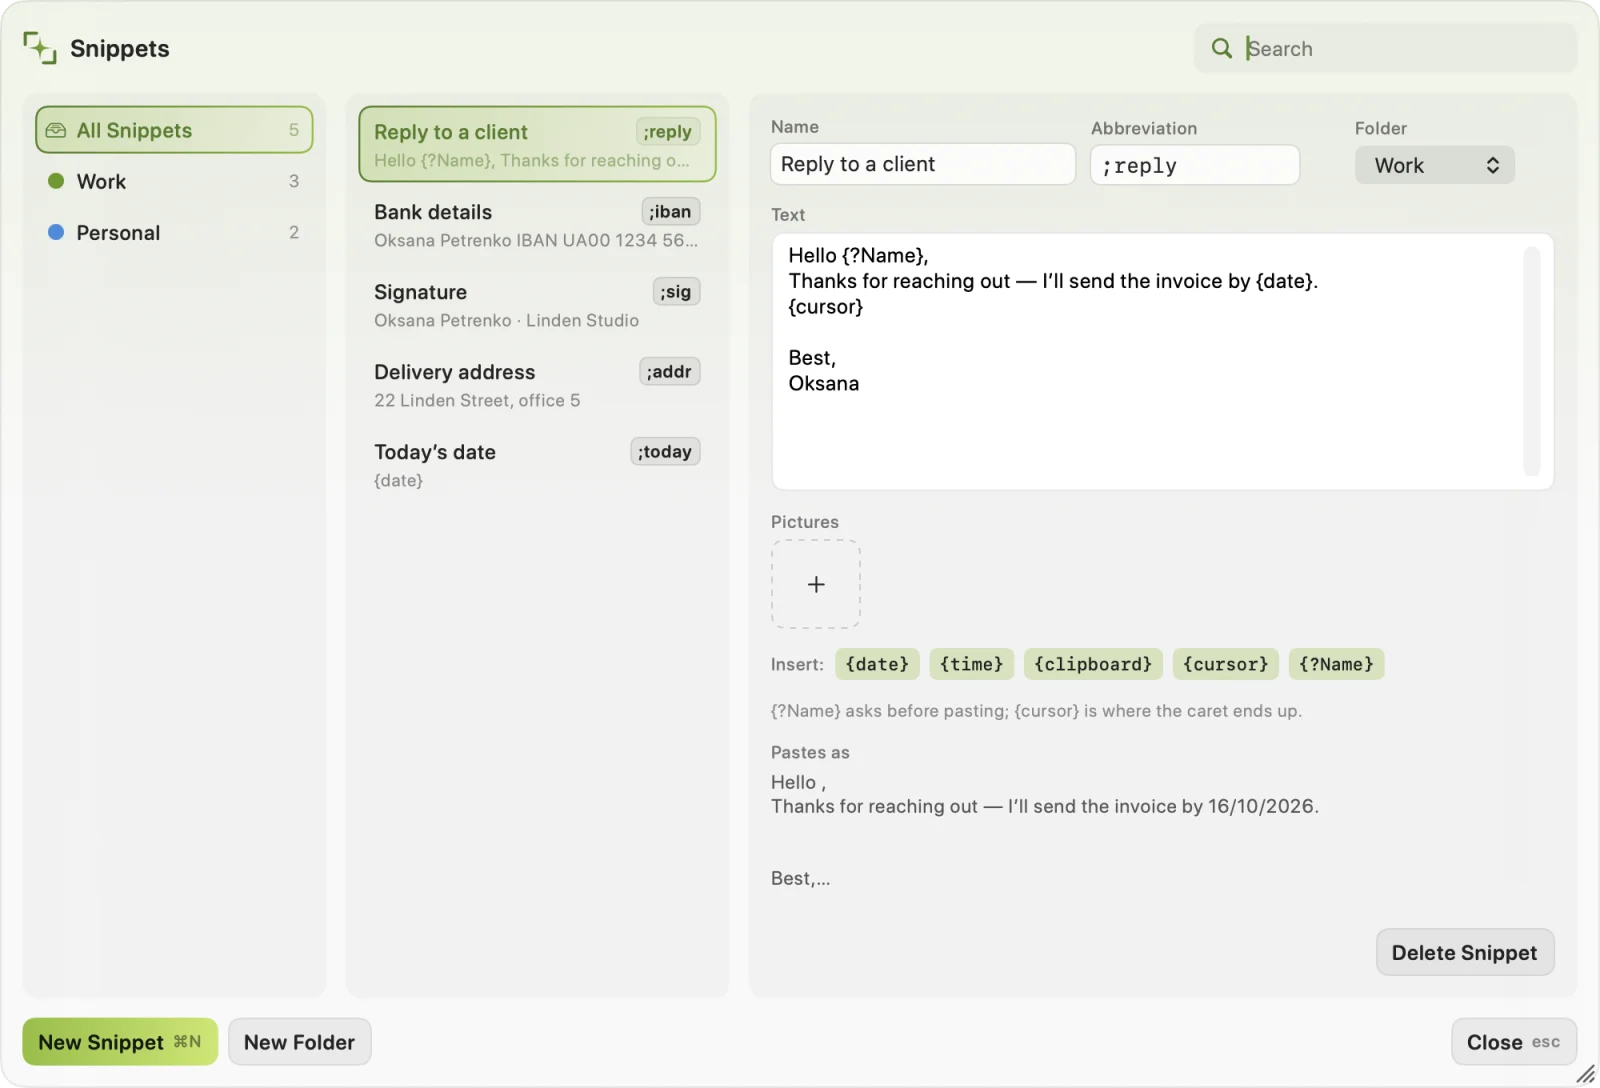
Text you type often, saved once: replies, signatures, addresses, bank details. Use them in two ways:
- By abbreviation. Type it in any app, like
;reply, and it turns into the full text. - From the panel. ⇧⌘B, or Tab in the clipboard panel. Folders are on the left (← →), ↩ pastes.
Fill-ins and questions
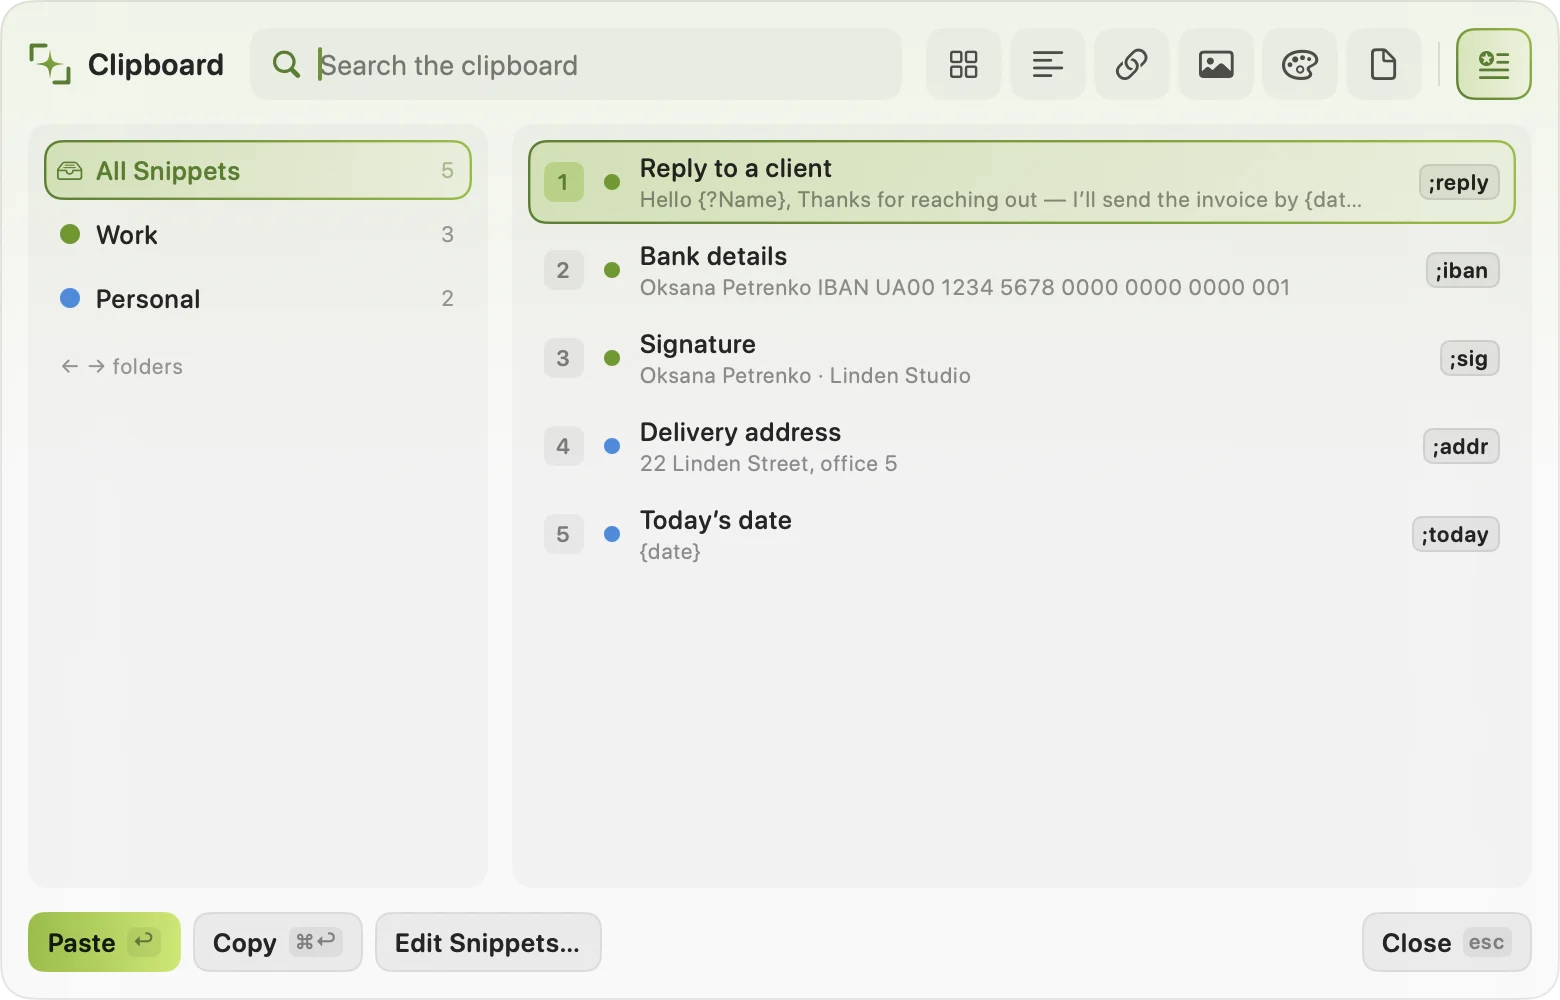
{date} · {time} | today’s date, the time now |
{clipboard} | what you copied last |
{cursor} | where the cursor ends up after pasting |
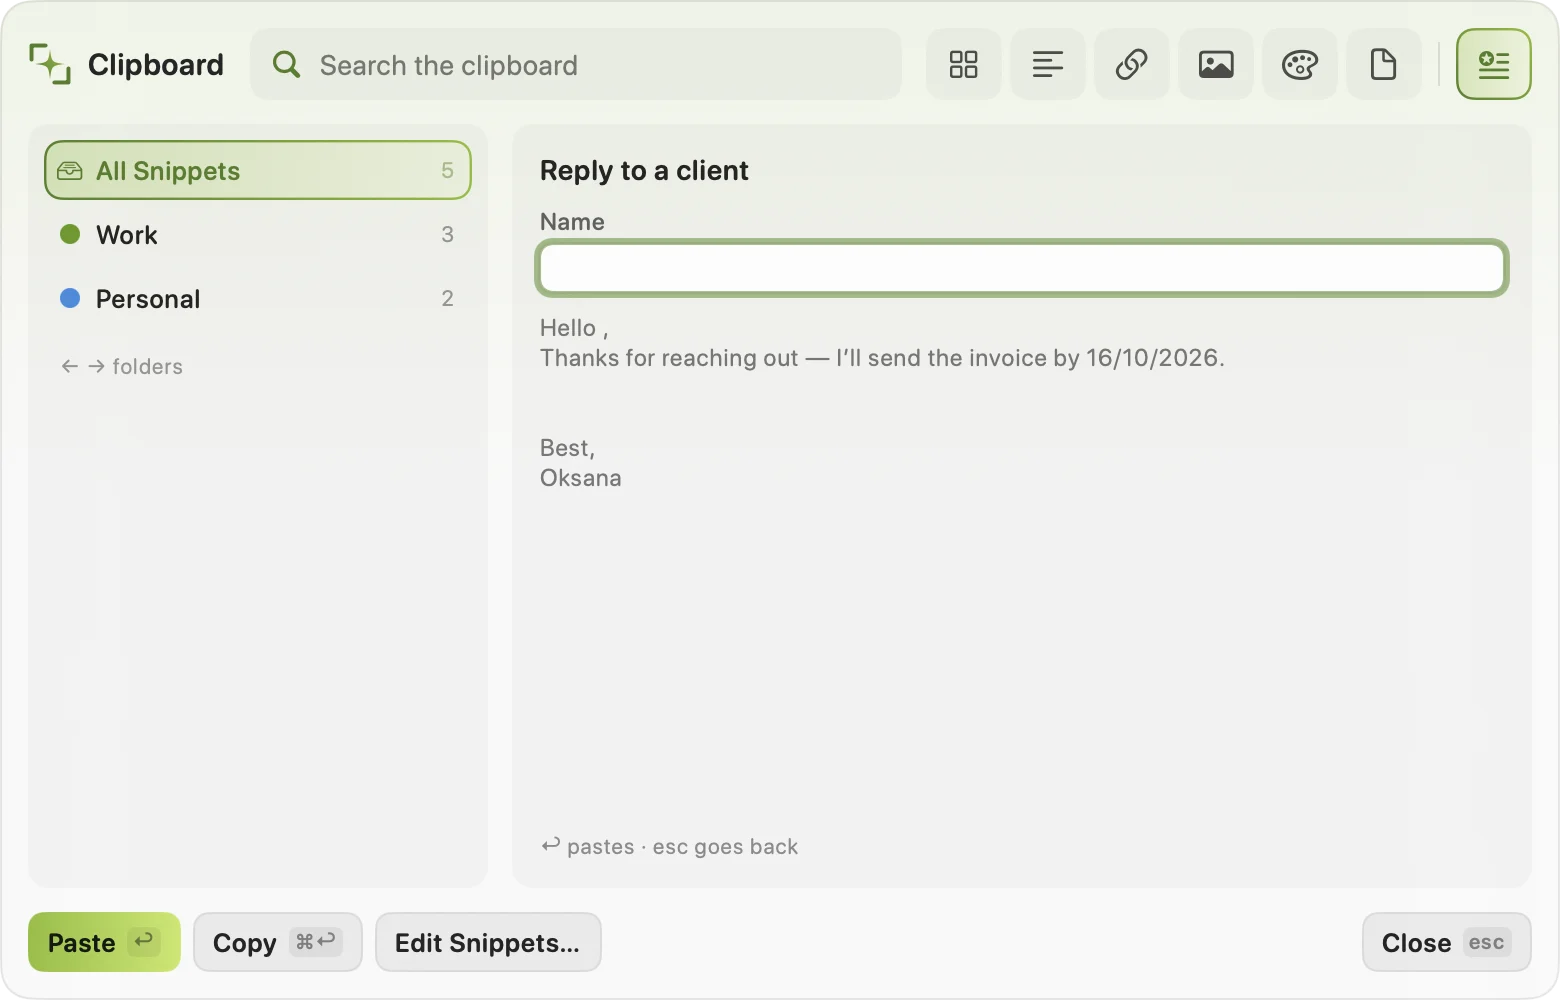
{?Name} | a question: the panel asks for it before pasting |
The snippet editor
Edit Snippets… in the panel or the menu bar. Coloured folders on the left, snippets in the middle, the one you’re editing on the right with its abbreviation, folder and pictures (they’re pasted along with the text). Share… on a folder gives its texts and pictures as files, to send to a colleague.
Text completion
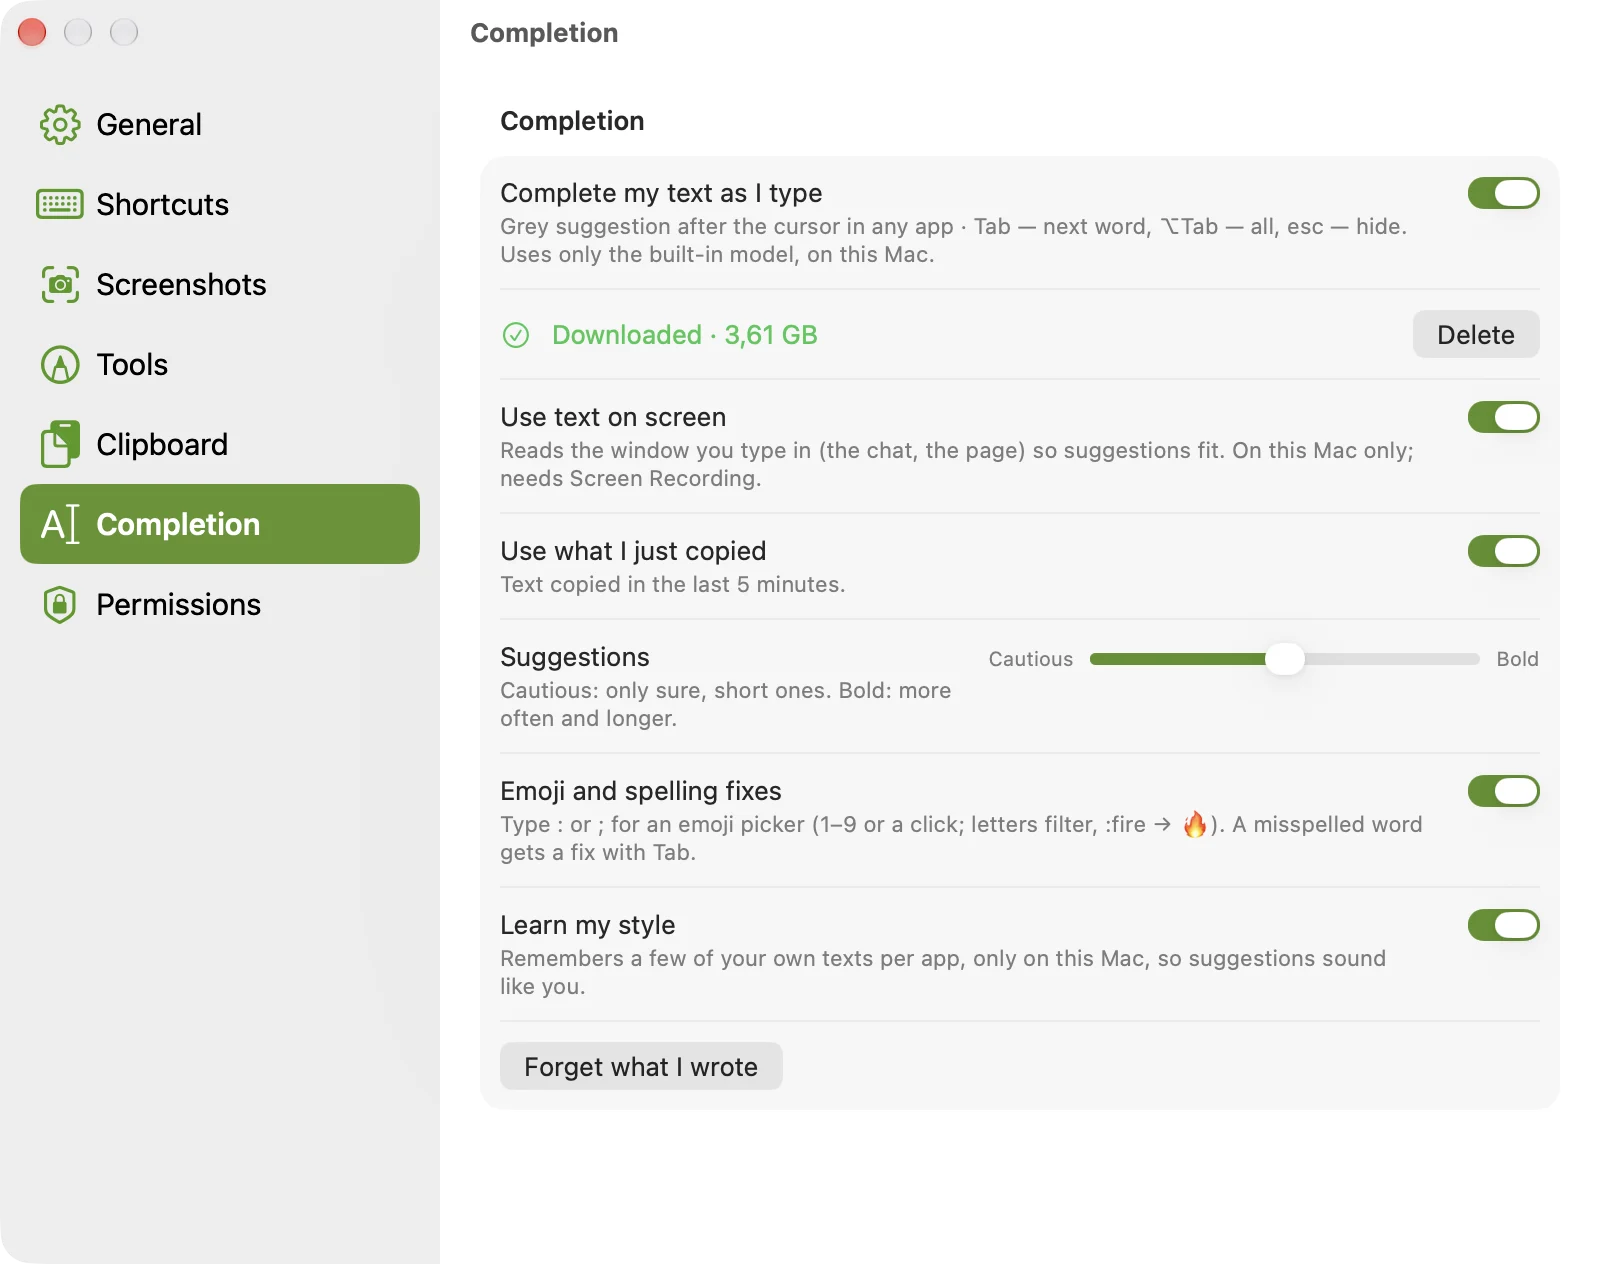
As you type in any app, a grey suggestion appears after the cursor. Take it or ignore it and keep typing. Complete my text as I type in the menu bar turns it on and off.
| Tab | take the next word |
| ⌥Tab | take the whole suggestion |
| esc | hide it |
| :word | emoji by name: :fire offers 🔥; more letters narrow the list, 1–9 or a click picks |
A misspelled word gets a fix you take with Tab too. The model runs on your Mac: nothing you type is sent anywhere.
In Settings › Completion: Suggestions from cautious (only sure, short ones) to bold; Use text on screen, so suggestions fit the chat or page you’re answering; Use what I just copied (never a password, a card number or a token); and Learn my style: a few of your own texts, kept on this Mac only, so suggestions sound like you. Forget what I wrote deletes them.
Watermark photos
Watermark Photos… in the menu bar puts one watermark on a whole folder of photos. Drop the photos in, set the text or logo, its size, see-through and tilt, and pick a spot for all of them. Any single photo can have its own spot, or you drag the mark by hand.
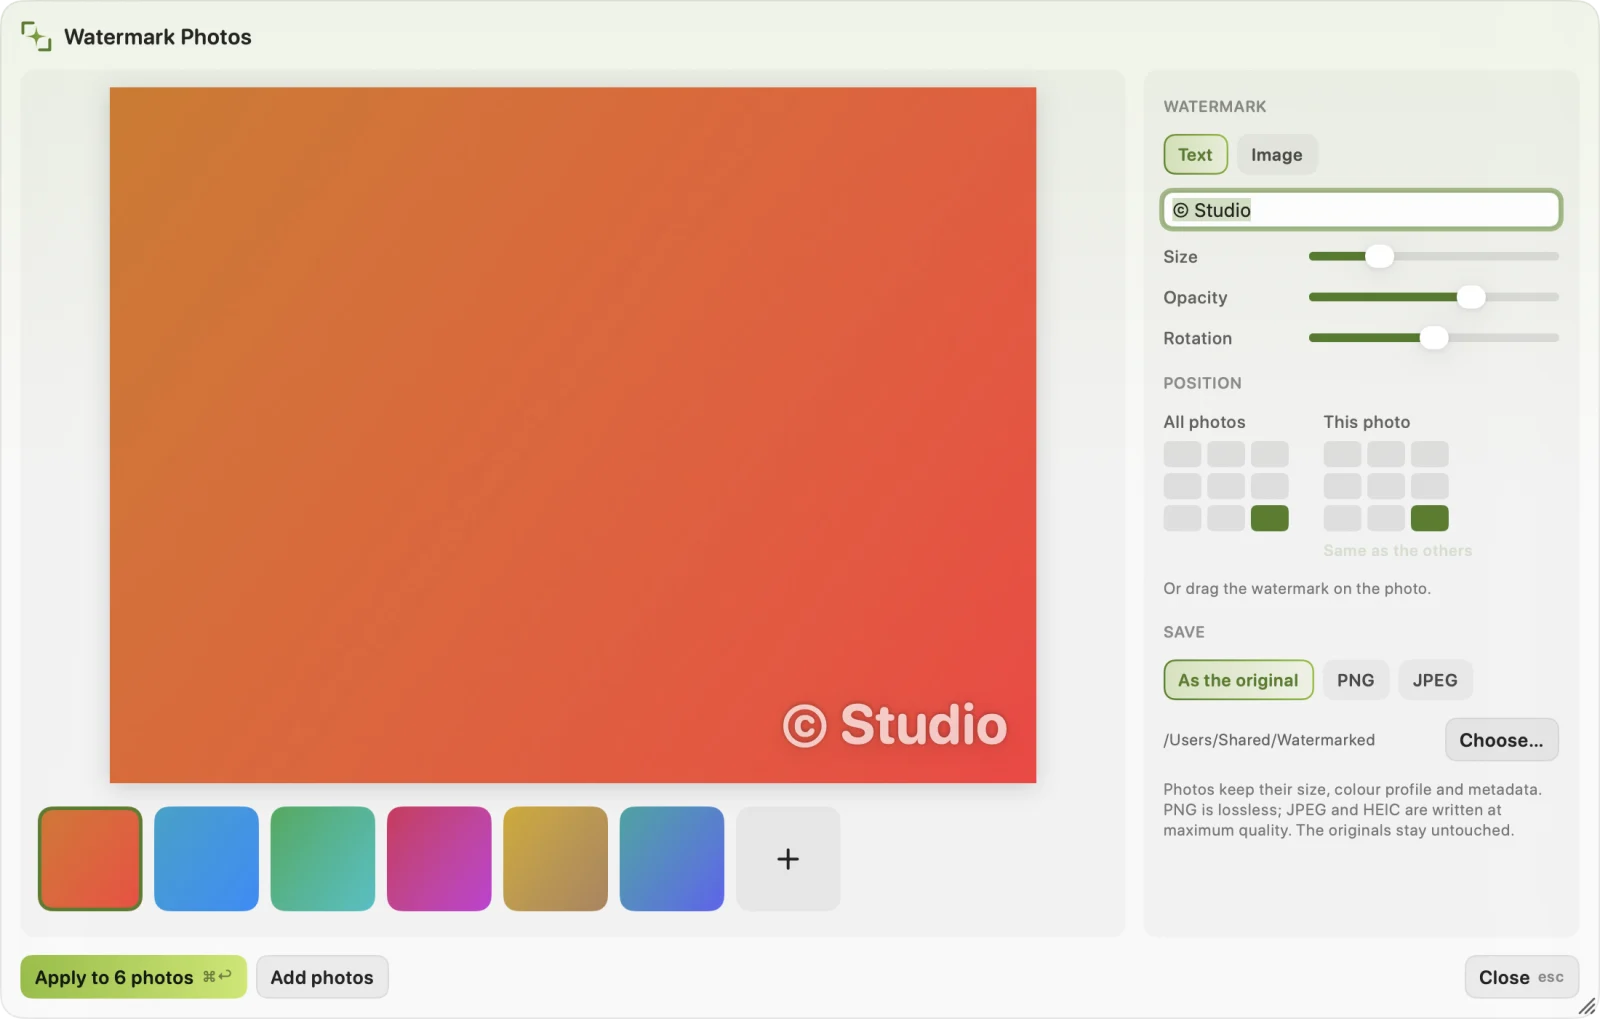
The results go to a Watermarked folder. Photos keep their size, colour profile and camera details; the originals stay untouched.
Settings
Open them from the menu bar: Settings…
Turn off what you don’t need
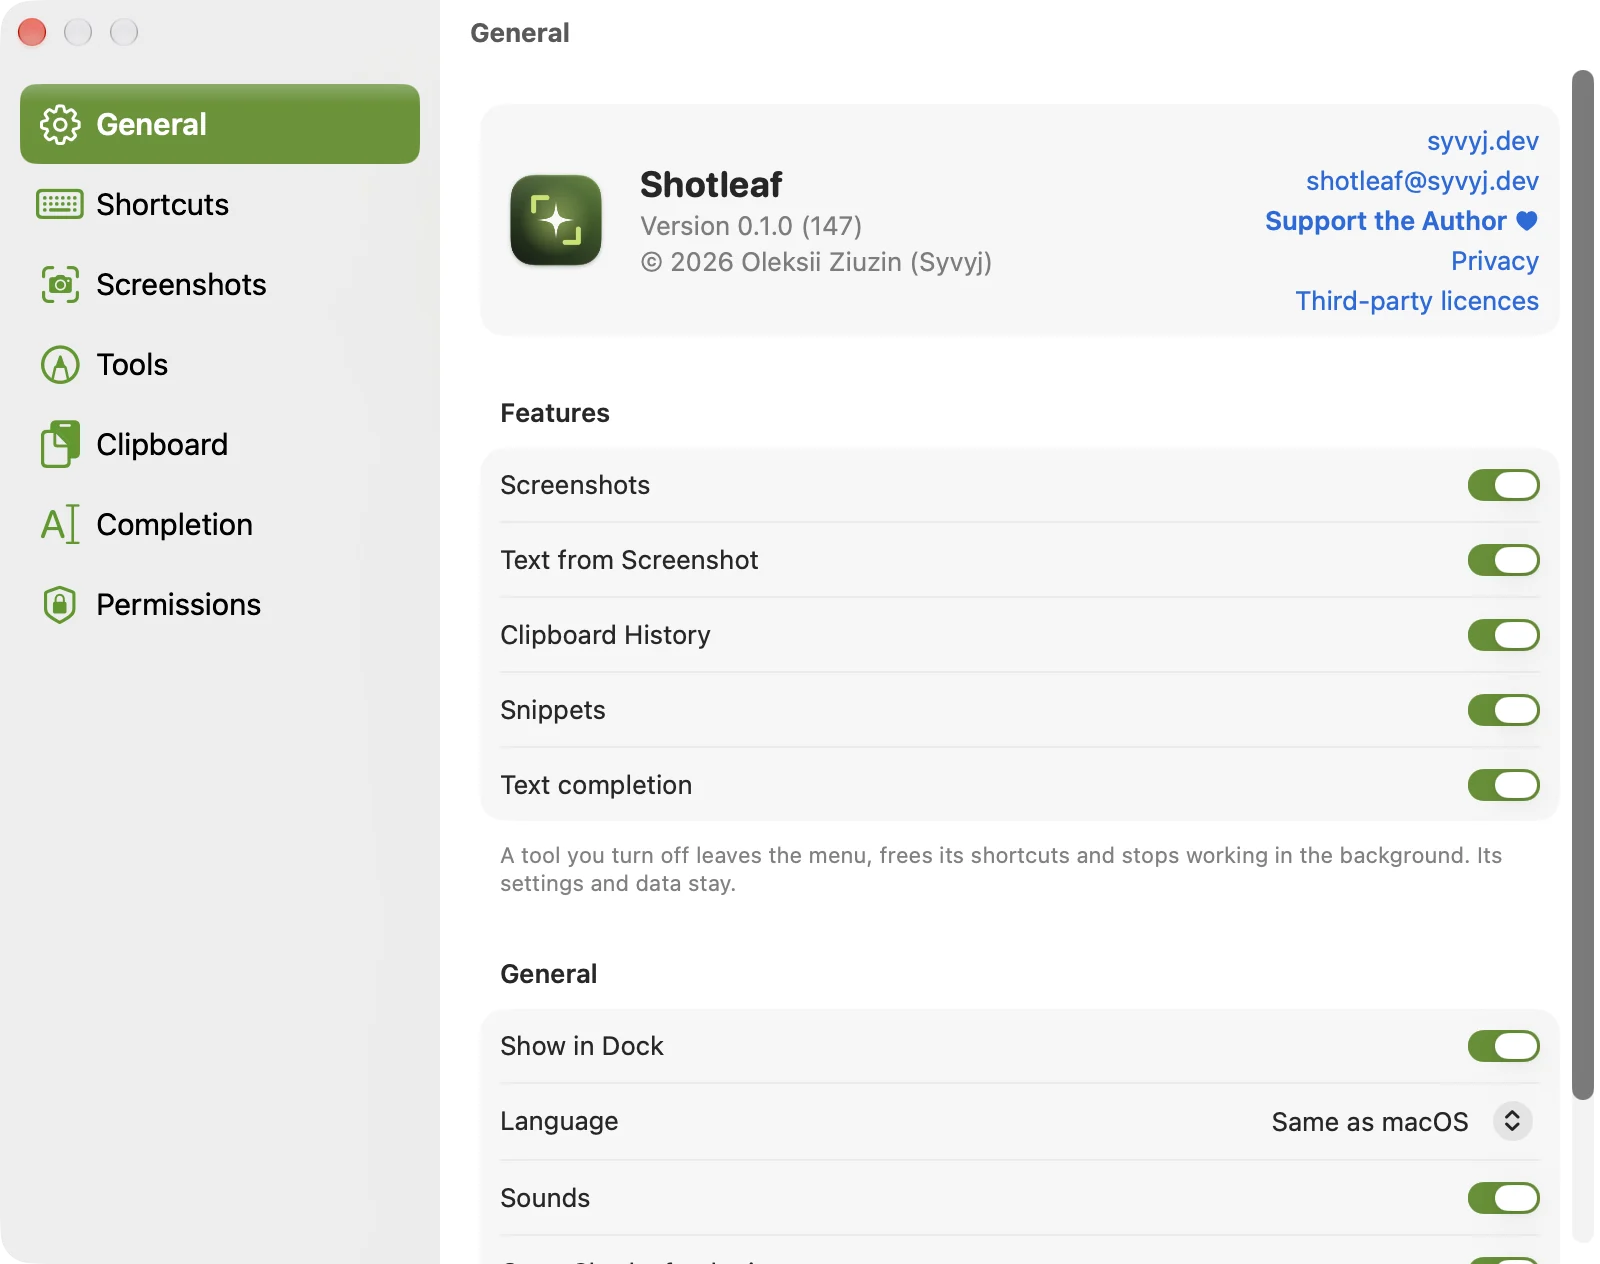
General › Features has a switch for each tool. One you turn off leaves the menu, frees its shortcuts for other apps and stops working in the background. Its settings and data stay, for when you turn it back on. Here too: the language (English or Ukrainian), sounds, the Dock icon and opening at login.
Your own shortcuts
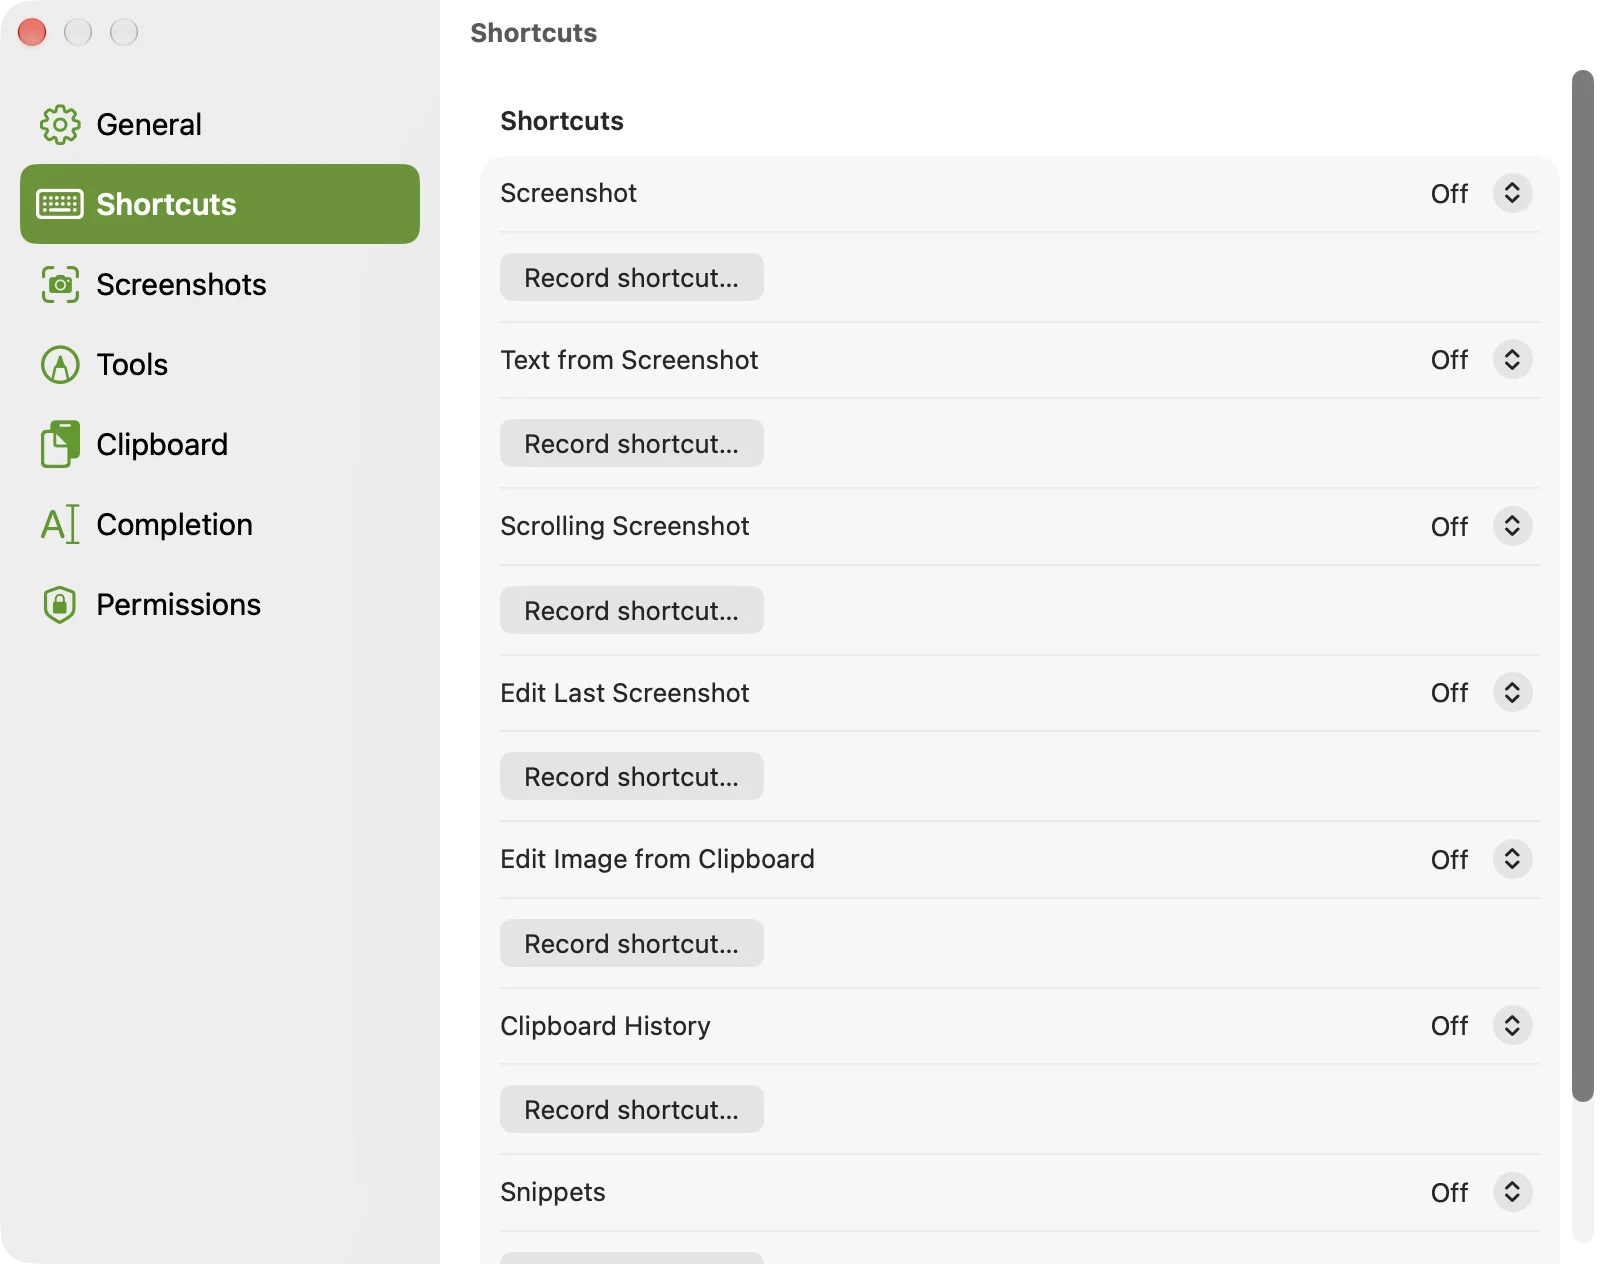
Shortcuts: click a shortcut and press the new one. ⌘⇧3 is also the macOS full-screen screenshot, and some apps use ⇧⌘V or ⇧⌘B; if one clashes with something you need, change it here.
If something doesn’t work
Screenshots show only the desktop picture, or pasting stopped working after an update
macOS may stop trusting the new copy with its permissions even though the switches still look on. Open System Settings › Privacy & Security, remove Shotleaf with – from Screen Recording and Accessibility, then allow it again. Shotleaf restarts by itself.
A shortcut does nothing
Another app may be using it: change it in Settings › Shortcuts. Also check that its tool is on in Settings › General › Features. If your keyboard goes through a keyboard-sharing app (Deskflow, Synergy, Barrier), it sends symbols rather than keys, so shortcuts with digits can depend on the layout on each computer; a shortcut with a letter works in any layout.
Snippets don’t expand, or nothing is pasted from the history
Both need the Accessibility permission: see Settings › Permissions. Snippets also need their tool on in General › Features.
No grey suggestions as I type
Check that the model is downloaded in Settings › Completion and that text completion is on in General › Features. Some apps don’t let other apps read their text fields. There are no suggestions in password fields, while secure input is on (sudo in a terminal, a password manager), in terminals, or in the apps under Settings › Clipboard › Never in these apps.
How do I remove everything?
Settings › General › Delete All Shotleaf Data… deletes the history, snippets, recent screenshots, your writing style, the model and the settings, then quits. Then drag Shotleaf from Applications to the Bin.
Still stuck? Write to shotleaf@syvyj.dev or open an issue on GitHub. If Shotleaf crashed, attach the newest Shotleaf-*.ips file from ~/Library/Logs/DiagnosticReports.